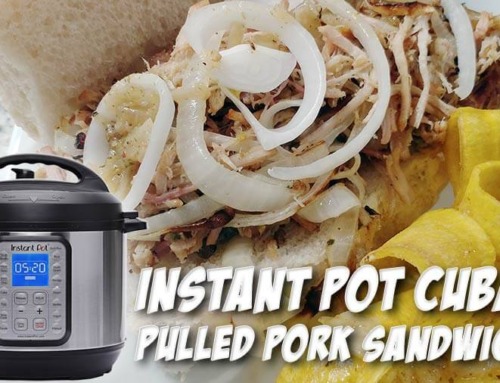

Welcome to another installment at the Redneck Cuban Kitchen, where today we’ll be addressing a request from you, the subscribers at the Cuban Redneck DIY Channel. Many of you have mentioned my Redneck Cuban Sandwich, which is nothing special. I think that people like it because it is a Miami, rather than a Tampa style sandwich. I understand that many accredit Tampa as the Cuban bread’s birthplace. It may have gotten started there, as did the Cuban sandwich, but it got perfected in the 305! After making it several times, I have tweaked the recipe to where it very easy to make not only Cuban bread at home but also frita buns with the same recipe. The controversy continues to come up in conversation every time I make a post or publish a video about any Cuban sandwich. Because there has been a lot of interest in medianoche sandwich bread and Cuban bread for making Cuban sandwiches and Pan con Lechon, I have decided to share my recipe!
Here is my take on Cuban bread. I called it a “modern version” because I did not use the traditional Plametto. Instead, I split the top by cutting it, but everything else is as authentic as you will get! If you live outside of Miami and or Tampa, you rarely find Cuban bread at the grocery store. Out here in Southwest Florida, most of the Cuban you see at the supermarkets is not truly Cuban but rather Puertorican bread, which is much softer and sweeter. I guess that the reason for this is that the traditional recipe for Cuban bread uses no preservatives. Cuban bread tends to get hard, stale, and dry quickly if not eaten within days after baking. For this reason, it is often not found in areas where there isn’t a great demand for it. But know that there is a vast number of recipes for days-old Cuban bread.
While a staple in cities with a large number of Cuban immigrants throughout the US, in places like Miami, Tampa, and Northern New Jersey, Cuban bread is not very well known in the Midwest despite its simple ingredients only requiring flour, yeast, lard, salt, and sugar. Yes, that is all, so I hope you are up to the challenge of making some homemade Cuban bread or frita bunds.
Cuban Bread Starter Recipe
While many would consider Cuban bread to be pretty simple white bread, similar to Italian and French bread, but has a slightly different baking method and ingredient. So before you embark on making homemade Cuban bread, you need to understand that there is more to it than just a Cuban bread recipe. That is because there is a technical part to it that many people get wrong, and if you get anything wrong when baking Cuban brad, well, you will end up with some type of bread, just not Cuba bread! What am I talking about? This bread uses lard and a double-hit of yeast plus a fermented starter.

Getting the starter right is vital. The starter is nothing more than a yeast and equal parts flour and warm water mixture that is allowed to age (ferment) for at least 12 hours. If you got this part right, you would end up with a sour-smelling mess and a separation of liquid and four. If it is creamy and firm, something has gone wrong. More than likely, the yeast has failed!
To make a starter, mix ½ pack of active dry yeast into a ½ cup of warm water. Cover it, and let it stand for 10-15 minutes. If the yeast shows signs of life (bubbling or foaming), add ½ cup of flour to the mixture, stir thoroughly, cover it with plastic, and let it sit in the fridge for at least 12 hours before using. On average, a starter will stay in the refrigerator for up to a week without spoiling.
Cuban Bread Recipe Ingredients
- 1 Cup of Starter
- 1 package of active dry yeast
- 2 teaspoons of sugar
- ½ cup of warm water
- 2 tablespoons of lard
- 2 teaspoons of salt
- 3~4 Cups of all-purpose flour
- Some cornmeal and atomizer spray bottle & water to spray tops of loaves
Making Cuban Bread
Once you have a good starter, you are ready to make Cuban bread! Let’s start by adding ½ cup of warm water to a large mixing bowl along with 1 pack of active dry yeast. We will cover this with a dry towel and let it stand for 10-15 minutes. Check on it after 10-minutes or so, and make sure that the yeast is alive and well! If it is foaming and bubbling, we are ready to proceed. If not, it is time to cut your losses and start all over at this point. Otherwise, you will end up with a bread that is dense, not characteristic of Cuban bread.
If the yeast is good, let’s add a cup of four, stir that. Proceed with adding 2 tablespoons of lard, 2 teaspoons of salt, and the starter. Start mixing with a large wooden spoon while adding about a ¼ cup of four at a time until the dough starts to detach from the mixing bowl’s wall. Once you have accomplished this, let’s move the mixture to a lightly floured work surface, your countertop, or a large cutting board.
We will knead this dough, and by this, I mean making it flat, fold it into itself, and then making it flat again while adding small amounts of flour until the dough is barely tacky. We want it to be a little sticky but no flour transfer to either the work surface or our hands. Also! If you poke it, it has to spring back. Otherwise, you need to knead a little more. Once this is accomplished, place the dough in a large, clean mixing bowl, oil the surface to keep it from dying, cover it, and let it proof for 2-hours in a cool/dry place. A cold over is ideal!
After 2-hour our dough should have doubled in size. At which time, we are going to put it back on a lightly floured work surface and flattened it out to remove any large bubbles. We now need to figure out if we are going to make just Cuban bread loaves or frita bunds, or a combination of both. After you figure out what you want to do, we need to partition our dough into equal parts. Shape it, and place them in a baking sheet that has been lined with parchment paper and lightly dusted with cornmeal. We will then lightly dust it with flour, cover it with a dry towel, and let proof in a dark, cool place for another 2-hours.
It s a good idea to get yours over going about 15 minutes before the time expires. If you are using your oven to proof your bread, simply take it out about 15 minutes before the 2-hours, and leave it on top of the countertop while your oven preheats to 400 degrees. Once your oven has come to temperature, uncover your bread and make ¼ inch deep cuts on top of your loaves with a sharp knife or razor.
Lightly spray your bread with cold water using an atomizer spray bottle and place it in the center rack of your oven. Get a small over save container, fill it with water, and put it on the bottom rack. Bake it for 11 minutes. Then rotate the baking sheet and cook the other side for another 11-minutes. For ovens with known hot spots, consider doing four rotations at 5-minute intervals.
Well, that is what it takes to make authentic Cuba bread. Although your house will get filled with the most amazing aroma, I suggest you place your bread on a cooling rack and let it sit for 4-5 minutes. That will keep it from collapsing.
My name is JC, and this the Cuban Redneck DIY Channel. I look forward to having you as a subscriber and please join us at our new Facebook group, Cuban Food Nation