
Hello, and welcome back to the Cuban Redneck DIY Channel Blog. I have to apologize for the slow flow of Ford Maverick content but getting part has been difficult. It seems that neither H&R nor Eibach are in a hurry to supply the demand of lowering springs for the number one selling truck in the US! Not having any information on spring rate, height, etc., is keeping me from pulling the triggest on wheels and tires. I am not in love with any of the over-the-counter exhaust options, so more than likely, we’ll be doing a custom exhaust but need to figure out the stance and ground clearance first.
In the meantime, let’s address the things we can address! For example, cruise control! Yes, I’m not sure, but I don’t recall reading anywhere prior to ordering my Maverick that cruise control was an option! I mean, hybrid is standard, but cruise control is an option? Something I wrong with whoever came up with that idea. That is no issue because, with FosScan and two NEW switches for the steering wheel, we can activate the factory cruise control on a Ford Maverick XL in less than 30 minutes! Yes, the ECU is cruise control ready.
Ford Maverick XL Cruise Control Hardware
First, let’s talk about the hardware we need. We are going to need to order the following Motorcraft parts SW8576 and SW8579. These are the left and right steering wheel switches. I got them from my local dealer, but I keep hearing what a bunch of losers many Ford dealers have turned out to be. If your local Ford dealer sucks, consider places like tascaparts.com. However, make sure you get a FORD or Motorcraft. Believe it or not, I have already seen Chinese stuff for the Maverick on Ali Express! Trust me, as much as I appreciate Harbor Freight prices. Sometimes it is just not worth it!
You are also going to need a USB to OBD II adapter interface. The one I used is listed below, along with a $5 mini-tool set required to replace the switches. If you are not too computer-savvy or have never done anything like this before, I am going to recommend the OBDLink EX FORScan OBD Adapter below.
Ford Maverick XL Cruise Control Hardware Installation
We already say this is a two-step process consisting of replacing the steering wheel control switches, updating the ECU, and letting it know that our Ford Maverick is cruise control ready. To replace the switches, we’ll start by disconnecting the battery. These terminals are fastened with impact wrenches, and they are pretty good. Whatever you do, don’t bang on it! That may cause the battery case to crack. With the battery disconnected, we can move to the inside of the vehicle. Put the key in the ignition and turn it to the run position. This will allow caps in the system to drain quicker. We then need to rotate the top of the steering wheel to the 9 o’clock position. Look for a small hole about 3/8th in diameter on the back of the steering wheel, almost directly behind the switch. Insert a small flat screwdriver in place, pointing up, and pry down to release the airbag on that side. Once accomplished, rotate the steering wheel to the 3 o’clock position and repeat the process. With the airbag detached, you first want to disconnect the horn cable, the single cable with the white terminal, and then work on the airbag terminals. Carefully pry the orange tab away from the yellow terminal and jiggle it out of place.
We now need to rotate the steering wheel back to the 12 o’clock position to remove the steering wheel facial holding the switches! We’ll start by placing four fingers on the underside and pushing down with your thumb while pulling up with the other fingers. Alternated between left and right a little at a time until the top row of pins releases. Once the top is loose, you may have to give a little help to the two silver color pings holding the bottom in place. After it, let go pull up toward you in the direction of the steering column. With the facia removed, replacing the switches is as simple as two small Torx screws. And after accomplishing that, all you have to do is reverse what you did in the removal process, starting at the bottom and working your way up.
Ford Maverick Cruise Control Programing with ForScan
As I mentioned in the video, I don’t want to make this a ForScan video because I was able to find everything I needed to know about programming my Ford Maverick’s cruise control online with minimum effort. There is a lot of helpful information on the forum. Still, if you are green when using software and USB to OBD II adapter to read and reset DTC, I recommend checking out a video called ForScan 101 by Ricardo’s Workshop. Probably the best video on this subject out there. So, let’s assume that you got ForScan to install, you got your USB to OBD II adapter, and you were able to connect to your Maverick – Let’s get started with the three steep programming sequences.
*Please watch the video to make a backup copy of your factory settings!
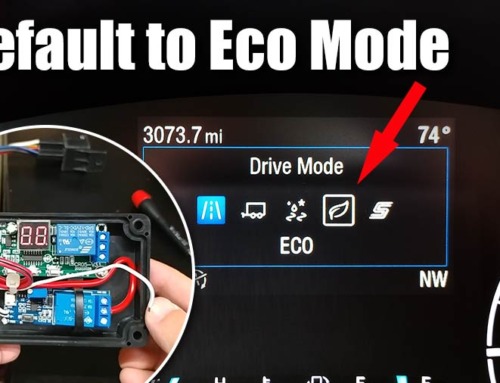
Step #1 – Click on the icon that looks like a CHIP from the left menu. From there, select SCCM (as BUILT format), click the PLAY icon (lower left), click ok on the warning pop-up, and look for section 724-02-01. We to change this to read 1258 4820 3030. Click the WRITE ALL tab (lower left), turn the ignition switch off and on, and click the STOP icon (lower left) to complete step 1 of 3! Please know that reports say that Ford Mavericks equipt with the Copilot 360 option need to use CODE: 1258 6820 3050. This is not something I have been able to verify.
Step # 2 – Click the configuration TAB at the top of the page, go to the ABS option, and once again click the PLAY icon (bottom left). Find the line named CRUISE CONTROL, and double click on it. A pop-up menu will come up. From there, choose “Option #2 Cruise Control.” Click WRITE (bottom left), turn the ignition switch off and on, and click the STOP icon (bottom left), to complete step #2! I have at least one report confirming that this worked on a HYBRID!
Step #3 – Click the configuration TAB at the top of the page, and go to the BdyCM Module Configuration (as BUILT format). After selecting it, click the PLAY icon (bottom left), click ok on the warning pop-up, and find section 726-04-05. In my programming, I only changed the last box to 8872! But know that it has been reported and recommended that HYBRIDS use CODE: CB28 8141 8873
After tuning your ignition switch off and on, you should be able to verify basic functionality by pressing the cruise control button on the left side of your steering wheel. This will show as an RPM icon in the center of your dash! However, a test drive is needed to check the set speed and disengagement function. I hope this video and post help you with your Ford Maverick cruise control installation. Although this procedure has been vetted and tested, some of these codes may have to be updated for performance enhancements, so check back here for future updates, and by all means, report any issues that you may have encountered!
Last update on 2026-07-16 at 16:58 / Affiliate links / Images from Amazon Product Advertising API